Showing posts with label hand embroidery. Show all posts

Saturday, December 29, 2018

FINAL STASH REPORT FOR 2018

Stash reports have been hit and miss for me this year.  
Since this is the final full week in December,
I decided to close the books on 2018.

 Fabric used this week 4.625 yards
Fabric used year to date  124.125 yards
Fabric added this week  0 yards
Fabric added year to date  62.125 yards
Net used 2018  62 yards

This is not my best report since I have been keeping track, 
but it is also not my worst!
I have continued to use more than I have added,
which was my goal.

This is my final finish of 2018, called A Year in the Garden.  The embroidery patterns and the final quilt design was a BOM in 2018, by Jenny of ELEPHANTZ

I added a final small green border to the original design.  I stitched the quilting by machine, using So Fine thread by Superior Thread.

Below are some close-ups.


I stitched feathered hooks in the final border, and simple leaves surrounding each framed block.  My goal was to create texture, and highlight the blocks.  The embroidery was done by hand.


Thursday, December 27, 2018

FINAL FINISH FOR 2018


During the past 12 months, I've been downloading and stitching some lovely patterns from Jenny of ELEPHANTZ

She offered a free BOM in 2018, with a new pattern each month.


I love hand embroidery, and had recently organized all my leftover threads from past projects and kits into zip bags, with one for each colour. 
It was fun to hunt through the bags each month to find some threads.

When I finished the December block, DH and I headed to my favourite local quilt shop to look for 2 fabrics to complete the project.
  I was having a difficult time choosing, as I didn't want the print to overwhelm my embroideries. 

(If you notice the pins in some of the pictures, I used them to mark registration points for the machine quilting.)


 DH asked me to give him some of the blocks, and a few minutes later he returned with the perfect bolt of fabric!


I'll share a picture of the completed quilt when DH is available as quilt holder!  The green frame was chosen to complement the print fabric.....

I've also been getting my fabric cut for a paper pieced mystery quilt that I'm doing with my winter quilt group.  I chose an autumn palette this time.

Monday, September 5, 2016

DESIGN WALL MONDAY

I began my morning hunting through my recipes, deciding what I was going to bake for both our pleasure, and to take along to my guild meeting on Wednesday evening.  I'm in charge of this month's "social committee", and we are responsible for snacks for everyone, and generally helping where needed before, during and after the meeting.  Every member is assigned a month to do this, and it helps to get more involved in the goings on at our monthly meetings.

I spent the rest of the morning cutting squares - 140 white ones and 160 red ones.  Now I have to start up my assembly line to make half square triangles to complete my redwork quilt project.
It is difficult to photograph a quilt on my new design wall, especially when the fabric is white on the white flannel, the lighting in the area is fluorescent, and the design wall is in a narrow hallway!

I pressed all the units yesterday, and trimmed them to size. (The bottom border didn't make it into the picture!) The missing star points will be made of half square triangle units, as well as the inside and outside borders.  I can see lots of stitching and trimming in my future!

I usually make a redwork project each year, but all the others have been made for children.  I hadn't made one for the past couple of years, and this one struck a chord!  DH is always surprised at how much time I spend doing the hand embroidery, but I love to keep busy while watching TV with him in the evenings - a win-win!

Check out all the creativity shared at Judy's blog, Patchwork Times.


Monday, August 29, 2016

DESIGN WALL MONDAY

There is nothing on my design wall, but I have a redwork project waiting in the wings.
I have stitched the centre medallion, the four corner triangles, and the four border units.  They all need to be pressed, then trimmed to size before I can continue.  I also need to make approximately 289 red and white half square triangle units to complete the project.

Currently, I'm machine quilting for a friend.  Her quilt top is like a giant puzzle right now, with me trying to find designs to stitch in each area!  Lots of fun

Check out all the creativity shared at Judy's blog, Patchwork Times.

Sunday, April 27, 2014

STASH REPORT SUNDAY

Fabric used this week  12.125 yards
Fabric used year to date  115.25 yards
Fabric added this week  0 yards
Fabric added year to date  28.5 yards
Net used 2014  86.75 yards

I finished the second flannel baby quilt.  This was a second project using leftover flannel.  Depending on the quilt that I back, and how accurate the flannel was cut, how much shrinkage occured during washing and drying, I have varying amounts left over after backing quilts.
Then I completed my version of Le Jardin by Red Brolly.

I stitched a different design in each of the coloured strips surrounding the embroidered blocks, repeating the designs by colour.  I used a pastel variegated thread.


Depending on the colour of each strip, the stitching showed more or less, but it gave me an opportunity to try some designs that are good for narrow areas.

This was fun to stitch, both by hand and by machine.  It made me remember some of the embroidery stitches that my Mother taught me, but I hadn't used in a very long time.  The quilting was challenging, finding many different, narrow, continuous line fills that suited the garden theme of the project.   I have to thank The Inbox Jaunt for much of the inspiration - her tutorials are great!

Join everyone at Judy's blog, Patchwork Times to see others' weekly reports.
 

Monday, April 21, 2014

DESIGN WALL MONDAY

Here are the final two hand embroidered blocks for my "Le Jardin" quilt, designed by Red Brolly.


I went hunting through my stash for a collection of pastel floral prints to make the blocks.  I finally found a few.....

Following the instructions, I decided the colours of each strip, block by block.

I found some floral stripe fabric that had been hiding in my stash, and decided to use it for the border, with a green leaf print for the cornerstones. 
 Now I'm off to hunt for some suitable backing fabric, as well as some for binding!

Check out all the creativity shared at Judy's blog, Patchwork Times.

Monday, April 14, 2014

DESIGN WALL MONDAY

My sewing room is slowly getting back up to speed after returning north.  We've just finished doing our income taxes for this year - always a stressful time.

I needed something to stitch while things were in limbo, so I turned to Red Brolly's "Girls Own Stitching Club" project called Le Jardin.  
I prepared the first 4 blocks and started stitching with a bag of leftover embroidery thread scraps from cross stitch projects.


When we arrived home, I chose a light gray print for the applique pieces required for the next 5 blocks, using the "other side" of the fabric, to make it appear more muted.


 This is a great project to use various embroidery stitches.  Some are so rarely used, and I like being a bit challenged.
There are instructions included for all the stitches!


I'm enjoying some of the whimsical details from the designer's imagination.

Two more blocks to go......
Then I can assemble the blocks into a lovely spring-summer wall hanging.


Check out the creativity shared at Judy's blog, Patchwork Times.


Monday, February 17, 2014

DESIGN WALL MONDAY

This wall hanging is about 40 inches square.  The tea pot blocks had been in my stash for a long time, but I think what stopped me from using them, was that there were only 8.  I decided to make a paper pieced block to round it out to 9, and found this one in my stash of patterns.  The original block was a mystery project from Paper Panache.  It was shared in time for Mother's Day a while back, and has a heart theme (handles, cup and tea pot lid).  There were also hearts on the pot, but I decided to make it all in print fabric instead.  I also used the same print for the binding.  Now I have to find a home for it!
Some things are difficult to photograph, and I find that embroidered blocks, especially those with lots of metallic thread are among the hardest for an amateur to do well......
All of the angel embroideries in this quilt were made with 3 shades of metallic thread, excluding their hair, skin and some small details.  The pot in the bottom right hand corner block is made of silver thread, and hardly shows at all. 

In person, this is a great quilt!  I decided to stop after the first border, but did add a narrow yellow accent strip to the edge before adding the binding.


Here's the star of the show!
 I just love the expressions on the sheep!  This is what attracted me to this project at first.


This project was designed by Natashia Curtin of Smee Designs and is found in the July 2012 edition of Australian Homespun magazine, available as an e-edition at Zinio.com


The designer's humour shows in every block.  My only complaint is that I was having such fun stitching the blocks, I was sad when I completed the last one!

Check out Judy's blog, Patchwork Times, to see all the shared creativity this week!

Monday, January 27, 2014

DESIGN WALL MONDAY

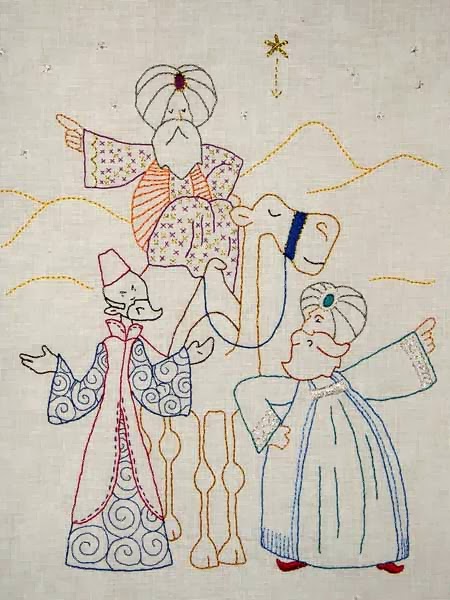
This is block 8, called "Keep It Down!"  I am working on the final block to complete "A Long Time Ago in Bethlehem".  I didn't stitch them in order - I cut the largest pieces of fabric first, to make sure I didn't have a seam anywhere, then cut the rest, making the best use of my background fabric.  My quilt group is going on an "outing" to a shop about 2 hours away on Wednesday, so I hope to find fabric for the sashing between the blocks, so I can assemble the centre of the wall hanging.  I think that the rest will wait until we return north in April, as I'm sure I have lots of fabric in my stash to complete the quilt.  I'm trying to use up my huge stash of Christmas fabrics....
Check out Judy's blog, Patchwork Times, to see all the creativity this week.....

Monday, January 20, 2014

DESIGN WALL MONDAY

I have completed the stitching on 4 more blocks for the "Long Time Ago in Bethlehem" quilt project.
 
Block 12 is the smallest - called "Hark"


Block 9 is called "Spotlight Angel"


Block 11 is "Eggsellent Advice"


Block 10 is "Glory of the Lord".  This is the block I saw that MADE ME want to stitch this project!  Every time I look at the sheep, I smile!


I pin-basted a small baby quilt panel, and I've almost finished the quilting, so I should have it completed for next week's report!.

Head over to Judy's blog, Patchwork Times to look at this week's creativity

Monday, January 13, 2014

DESIGN WALL MONDAY


I've kept busy this week finishing projects and doing some machine quilting during the day, and stitching blocks for "A Long Time Ago in Bethlehem" during the evenings.  I love the look of the metallic thread, but it is a bit of a struggle from time to time.  The silver looks wonderful in person, but doesn't photograph well.

I love the humor in each block - the designer did a wonderful job!

This block is titled "Which Way?"
The "Mice Burglars" are having fun with the gold, frankincense in the chest and mhyrr in the silver bottle.....

Check out Judy's blog, Patchwork Times, to see what other quilters are playing with this week.

Monday, January 6, 2014

DESIGN WALL MONDAY

  A year or so ago, I saw someone working on this lovely Christmas project.  The pattern is "A Long Time Ago in Bethelehem" and was in the July 2012 issue of Australian Homespun magazine.  After hunting everywhere for a copy, I discovered it was available as an e-magazine download, so I was able to find the original pattern, and the link to the rest of the blocks.  Pardon the wrinkles and folds, as I haven't pressed any of these since they were completed.

 Block 5 is called the Reluctant Donkey.  I love the humour in each of the blocks!
Block 2 is called "Kitchen Sink Camel".  This reminded me of a picture that my Father-in-law took of DH's Grandmother packing after a month visit.  There was so much stuff that he added the old kitchen sink to the pile!  I wish I had a copy of the picture....
Last night I noticed that my bin of leaders and enders was getting full, so I sat, while listening to the end of an audio book, and stitched the "2-patches" into 3's then into 9-patches.

Head over to Judy's blog, Patchwork Times, to see what others are working on this week!