While my two tall sons are visiting, I took advantage of their help to get pictures of 3 large quilts - 2 completed in 2012 and one in 2013. I think I need to invest in a quilt stand! I have added the pictures to the appropriate pages as well!
This hexagon quilt was inspired by Bonnie Hunter. The top was English paper pieced by hand, then appliqued onto the green border. I used the leftover cut squares to make a prairie point edging - my first!
Oriental Kaleidoscope was inspired by Bethany Reynolds of "Stack n Whack" fame. The centre was completed, then I make it larger by adding pieced borders, using the original fabric.
Dawn and Dusk was just completed last month. The pattern is by Judy Laquidara, and was found in Quiltmaker magazine. I pieced the top and basted it while in the south, then completed the machine quilting recently.
It is always a challenge to photograph large quilts, and my sons were standing on two step-stools, and battling a breeze. Someday, it would be nice to be able to take the pictures in a more controlled environment!
Showing posts with label quilts. Show all posts
Saturday, July 13, 2013
Monday, January 16, 2012
DESIGN WALL MONDAY
This is the back of the cathedral windows project. The black fabric is the one that shows through when the edges are stitched in place on the front. The whole thing is made from 2 sizes of squares and one size of rectangles.
Here is the right side. I used leftover muslin for the "frames" (the part that gets turned and stitched down.) The squares of plaid are filling the full squares, and triangles for the edges. The triangles are stitched in when you add the border.
The top is layered to the batting and batting at this point, and then you stitch down the bias edges of the muslin. I machine stitched them down, trying to stitch a continuous line as much as possible. Then all I did to finish the little quilt was to add binding!
Shelley Swanland's book "Machine Stitched Cathedral Windows" is currently out of print, but she has some copies for sale through her website, and there are some used copies available on Amazon.
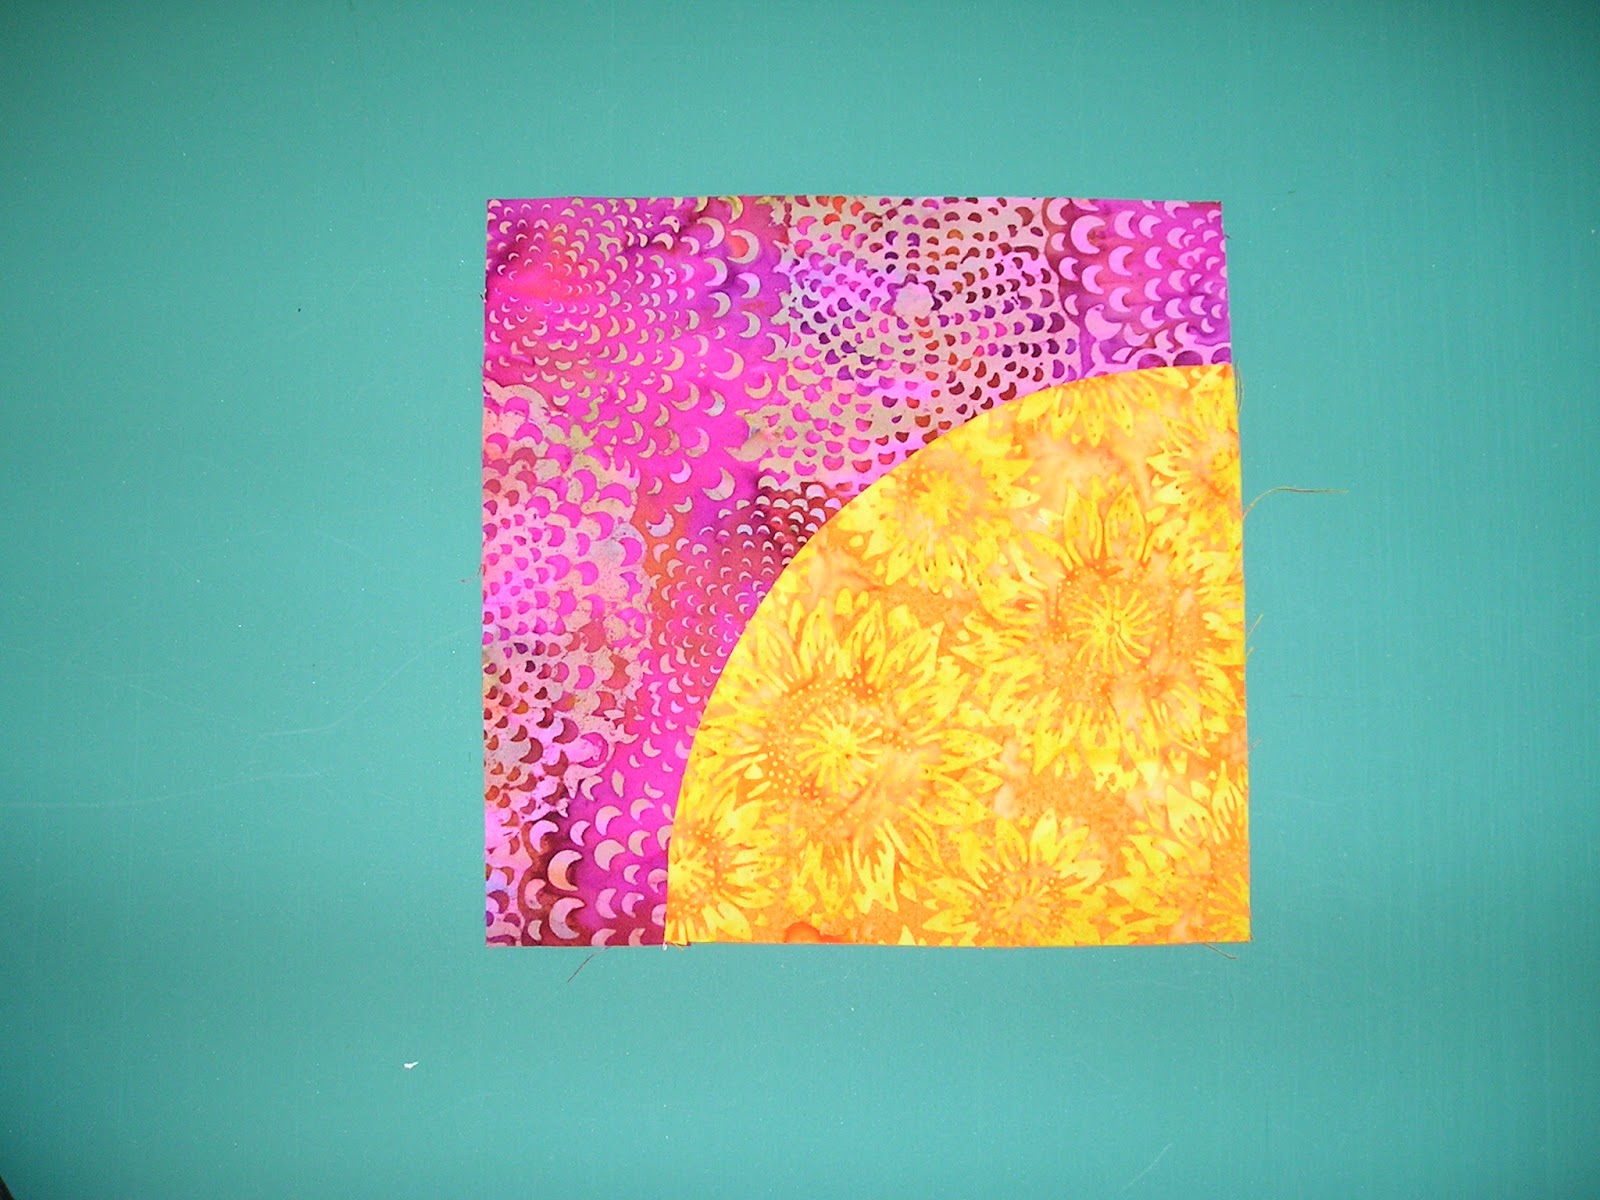
This is my test "Drunkards Path" block, stitched without pins! I plan to teach this method to my quilting group soon. Most quilters are afraid of sewing curves, but if you use the correct method, it is easy. I didn't even square up the block when I finished sewing - just a quick press!
This is my next cathedral window project. The squares are larger than the plaid wall hanging, and there will not be any small squares added on top. The pretty mottled, multi-coloured batik will show through, and so will the great batik squares on top! Even after reviewing the method by making the small wall hanging, I've had to do some un-sewing! Then next colour added will be the outside of the centre section. Then it just has two borders added before "quilting" (stitching down the edges of the frames!)
Here is the right side. I used leftover muslin for the "frames" (the part that gets turned and stitched down.) The squares of plaid are filling the full squares, and triangles for the edges. The triangles are stitched in when you add the border.
The top is layered to the batting and batting at this point, and then you stitch down the bias edges of the muslin. I machine stitched them down, trying to stitch a continuous line as much as possible. Then all I did to finish the little quilt was to add binding!
Shelley Swanland's book "Machine Stitched Cathedral Windows" is currently out of print, but she has some copies for sale through her website, and there are some used copies available on Amazon.
This is my test "Drunkards Path" block, stitched without pins! I plan to teach this method to my quilting group soon. Most quilters are afraid of sewing curves, but if you use the correct method, it is easy. I didn't even square up the block when I finished sewing - just a quick press!
This is my next cathedral window project. The squares are larger than the plaid wall hanging, and there will not be any small squares added on top. The pretty mottled, multi-coloured batik will show through, and so will the great batik squares on top! Even after reviewing the method by making the small wall hanging, I've had to do some un-sewing! Then next colour added will be the outside of the centre section. Then it just has two borders added before "quilting" (stitching down the edges of the frames!)
Check out what everyone is working on at Judy's blog!
Labels:
cathedral windows,
design wall,
drunkards path,
quilts
Friday, October 21, 2011
CHRISTMAS PAST
While hunting through my closet, looking for a tree skirt for DS2, I came across a few oldies but goodies that I made as a beginning quilter.
The tree skirt was made using a Quilt in a Day pattern. The original, following the directions was too large, and became a table covering for my circular table, and this is the second one, made after downsizing the beginning diamond shape and the strips.
There were two different blocks made with the dark and light sides in different orientation.
Since my Mother-in-law passed away last summer, DS2 and future DIL are inheriting her artificial Christmas tree and the tree skirt, along with a few home made ornaments.
This is a door banner I made while I was a beginner. It was my first attempt at making mitred corners with a stripe fabric.
This was a free pattern from Connecting Threads for a card holder wall hanging.
This was an early attempt to make a quilt from a large block, inspired by a book by Mary Ellen Hopkins.
Another early Quilt in a Day pattern. I added gold bows to decorate the tree, and stitched another mitred border.
I believe that this pattern was from a Debby Mumm book.
This miniature is from a pattern from Miniature Quilts magazine. The star in the centre and the cornerstones are made of gold lame fabric, fused to interfacing. To quilt the stars, I cut them from freezer paper, ironed them onto the top and stitched around each one.
This is the Christmas wreath pattern from Quilt in a Day. This was a remake that I used as a group sample, when I was in charge of the quilting group in Panama City FL. I had made two before, one was a gift, and one decorates the front of our Florida home during the holiday season. I was inspired by the more Victorian colouring in the pointsettia print.
The tree skirt was made using a Quilt in a Day pattern. The original, following the directions was too large, and became a table covering for my circular table, and this is the second one, made after downsizing the beginning diamond shape and the strips.
There were two different blocks made with the dark and light sides in different orientation.
Since my Mother-in-law passed away last summer, DS2 and future DIL are inheriting her artificial Christmas tree and the tree skirt, along with a few home made ornaments.
This is a door banner I made while I was a beginner. It was my first attempt at making mitred corners with a stripe fabric.
This was a free pattern from Connecting Threads for a card holder wall hanging.
This was an early attempt to make a quilt from a large block, inspired by a book by Mary Ellen Hopkins.
Another early Quilt in a Day pattern. I added gold bows to decorate the tree, and stitched another mitred border.
I believe that this pattern was from a Debby Mumm book.
This miniature is from a pattern from Miniature Quilts magazine. The star in the centre and the cornerstones are made of gold lame fabric, fused to interfacing. To quilt the stars, I cut them from freezer paper, ironed them onto the top and stitched around each one.
This is the Christmas wreath pattern from Quilt in a Day. This was a remake that I used as a group sample, when I was in charge of the quilting group in Panama City FL. I had made two before, one was a gift, and one decorates the front of our Florida home during the holiday season. I was inspired by the more Victorian colouring in the pointsettia print.
Wednesday, September 14, 2011
A COMMISSION
My BFF commissioned me to make a set of 6 placemats and napkins, to be used as a wedding gift. She spent about an hour with me on Sunday, looking at patterns, and choosing fabric. I had a partial bolt of batik that had some of the colours in the china that the happy couple had selected, and we spent some time finding two other coordinating fabrics. Of course, the pattern that she chose for the placemats had tons of half-square triangle blocks.
Monday, I spent most of the day sewing, pressing and squaring up these.....
Tuesday, I spent the morning waiting for the cable guy - the digital transition isn't going as smoothly in Canada as it did in the US! I did managed to get to my sewing room after lunch and pieced the centres of the place mats. They still have a narrow border to be added.
When we were choosing fabrics, she spotted the cream fabric - leftover from my Baltimore quilt. I only had a narrow piece, including the fold, after cutting the blocks. I measured it, and there was just enough to make the blocks for these mats.
Monday, I spent most of the day sewing, pressing and squaring up these.....
Tuesday, I spent the morning waiting for the cable guy - the digital transition isn't going as smoothly in Canada as it did in the US! I did managed to get to my sewing room after lunch and pieced the centres of the place mats. They still have a narrow border to be added.
When we were choosing fabrics, she spotted the cream fabric - leftover from my Baltimore quilt. I only had a narrow piece, including the fold, after cutting the blocks. I measured it, and there was just enough to make the blocks for these mats.
Labels:
half-square triangles,
place mats,
quilts,
scraps
Thursday, September 8, 2011
TWO MORE PROJECTS STARTED
I spent the afternoon choosing fabrics for quilts for my BFF's two granddaughters. I began with a panel for one, and yardage for the other, then played with EQ7 to make the quilts big enough for their single beds.
The hardest part was finding pieces of fabric from my stash with enough yardage to complete the borders! Many of my pieces are a yard or less, and although I have some fabric wrapped on bolts, nothing seemed to be the right colour for these quilts! I kept hunting, making design/colour changes as I went, and managed to find enough to make the two quilt tops!
EQ makes my job easier, as I make notes of all the measurements for the borders, and cut them all before beginning the quilt. I mark the centre point of each border on each edge to help lining them up. Once the borders were cut, I placed them on a hanger in the order I'd use them. This certainly sped up the whole assembly process.
Quilt one, uses a Raggedy Ann panel that I found last fall, and then I found 2 coordinating prints at a shop in Houston, while visiting the quilt festival.
Quilt two uses a 1 1/2 yard panel of cute quilt blocks that has been waiting in my stash for the perfect requirement.
Off to the cutting table! More later.......
The hardest part was finding pieces of fabric from my stash with enough yardage to complete the borders! Many of my pieces are a yard or less, and although I have some fabric wrapped on bolts, nothing seemed to be the right colour for these quilts! I kept hunting, making design/colour changes as I went, and managed to find enough to make the two quilt tops!
EQ makes my job easier, as I make notes of all the measurements for the borders, and cut them all before beginning the quilt. I mark the centre point of each border on each edge to help lining them up. Once the borders were cut, I placed them on a hanger in the order I'd use them. This certainly sped up the whole assembly process.
Quilt one, uses a Raggedy Ann panel that I found last fall, and then I found 2 coordinating prints at a shop in Houston, while visiting the quilt festival.
Quilt two uses a 1 1/2 yard panel of cute quilt blocks that has been waiting in my stash for the perfect requirement.
Off to the cutting table! More later.......
Wednesday, September 7, 2011
FINISHED MY BALTIMORE QUILT!
I made the final quilting stitches yesterday morning, then spent an hour or so checking for thread ends on the back, etc. I try to be a tidy quilter, but I use my thread cutter on the Juki without thinking, and then need to hunt down the pesky thread ends!
The pattern is Baltimore Bliss by Fat Cat Patterns. I took a few pictures of the quilting, but I'll have to wait until we get some help to take a picture of the whole quilt.
The feathers in the sashing was stitched with Sulky gold "sliver" thread, a flat mylar filament. It sparkles much more in person!
I used the same thread to stitch the swirl in the cornerstones.
I stitched the background pattern in the neutral areas of each block. The decorative stitching on the appliques was done before the top was assembled.
This is the best shot that I could get of the quilt top, and it doesn't show the borders at all. The colours are a bit washed out from the lighting - I'll have to figure out a better way to photograph my quilts!
If you want to see the border fabric, it is shown here.
I decided to call this one
" The Orient Visits Baltimore"
The feathers in the sashing was stitched with Sulky gold "sliver" thread, a flat mylar filament. It sparkles much more in person!
I used the same thread to stitch the swirl in the cornerstones.
I stitched the background pattern in the neutral areas of each block. The decorative stitching on the appliques was done before the top was assembled.
This is the best shot that I could get of the quilt top, and it doesn't show the borders at all. The colours are a bit washed out from the lighting - I'll have to figure out a better way to photograph my quilts!
If you want to see the border fabric, it is shown here.
Monday, August 29, 2011
DESIGN WALL MONDAY
My design wall is empty! I will not begin another project until the quilting is done on my Baltimore quilt! I didn't get much done yesterday, as our power was "out" from 2 - 6:30 pm - wind damage from the edge of Irene.
This is the quilt that was on my table, under the baked goodies - I finally took its picture! It was the first hand appliqued quilt that I ever made. I bought the pattern from a quilt shop in Orlando (now closed) that specialized in historical reproduction and wool fabric. I can't find the pattern to give credit to the designer...... I use the quilt as a table cover during the fall and winter months, removing it when using the table!
This quilt is used on my table during the spring/summer months. Again - I have no idea what pattern I used. I remember seeing the pattern in a magazine, and when I went to the fabric store, I found a great overall flowered print and a matching stripe - both required for the pattern. The background was supposed to be a stripe, but as I couldn't find one, I used a solid blue and quilted the lines with a variegated blue thread.
I'm heading off to machine quilt all day! Check out Judy's blog to see what others are working on this week!
This is the quilt that was on my table, under the baked goodies - I finally took its picture! It was the first hand appliqued quilt that I ever made. I bought the pattern from a quilt shop in Orlando (now closed) that specialized in historical reproduction and wool fabric. I can't find the pattern to give credit to the designer...... I use the quilt as a table cover during the fall and winter months, removing it when using the table!
This quilt is used on my table during the spring/summer months. Again - I have no idea what pattern I used. I remember seeing the pattern in a magazine, and when I went to the fabric store, I found a great overall flowered print and a matching stripe - both required for the pattern. The background was supposed to be a stripe, but as I couldn't find one, I used a solid blue and quilted the lines with a variegated blue thread.
I'm heading off to machine quilt all day! Check out Judy's blog to see what others are working on this week!
Thursday, August 25, 2011
A SMALL FINISH
Since I was machine quilting today, I thought I'd take some time from my big project to complete a small item or two.
The hot pad is layered with some "Insul-bright" batting, along with a layer of cotton batting, to protect the table from heat.
With the fabric I had available, I was only able to make 3 place mats! Two will go to DS2 & future DIL, and the third will be donated to my guild's boutique at next June's quilt show.
I outlined the daisy motifs with free motion stitching.
The hot pad is layered with some "Insul-bright" batting, along with a layer of cotton batting, to protect the table from heat.
With the fabric I had available, I was only able to make 3 place mats! Two will go to DS2 & future DIL, and the third will be donated to my guild's boutique at next June's quilt show.
I outlined the daisy motifs with free motion stitching.
Wednesday, August 10, 2011
ONE DOWN AND ONE TO GO
I finished the tote bag, made from the section removed from the quilt. I was fortunate to find some of the dark green fabric - just enough to make the handles.
I fused a double layer of "Peltex" to make a firm bottom, and covered it with a pink print. I slip-stitched the ends inside the bag. I decided that it would be too tall with all the "borders" exposed, so I decided to turn the large pink border inside, to form a facing. I machine stitched the edge, then slip-stitched it to the inside of the bag. The handles were top-stitched, with lots of reinforcing to hold them secure.
I still had 12 blocks remaining in a long strip, 2 blocks wide. I decided to take it apart to make the centre of a baby quilt.
(Sorry for the slightly blurry picture!) I covered the seam in the back with a folded strip of the fabric planned for a border, and stitched it down by hand, after inserting a small piece of batting. The batting will be held in place when I re-quilt in the ditch, as well as along some of the shapes. I had to remove some stitching so that I had access to the seam allowance to sew it together.
I found this pink and brown print in my stash, along with a green that had the right tones for the quilt. I plan to use the same green for binding. Now I have to add backing and batting the perimeter of the quilt - a little tricky, but not impossible!
I fused a double layer of "Peltex" to make a firm bottom, and covered it with a pink print. I slip-stitched the ends inside the bag. I decided that it would be too tall with all the "borders" exposed, so I decided to turn the large pink border inside, to form a facing. I machine stitched the edge, then slip-stitched it to the inside of the bag. The handles were top-stitched, with lots of reinforcing to hold them secure.
I still had 12 blocks remaining in a long strip, 2 blocks wide. I decided to take it apart to make the centre of a baby quilt.
(Sorry for the slightly blurry picture!) I covered the seam in the back with a folded strip of the fabric planned for a border, and stitched it down by hand, after inserting a small piece of batting. The batting will be held in place when I re-quilt in the ditch, as well as along some of the shapes. I had to remove some stitching so that I had access to the seam allowance to sew it together.
I found this pink and brown print in my stash, along with a green that had the right tones for the quilt. I plan to use the same green for binding. Now I have to add backing and batting the perimeter of the quilt - a little tricky, but not impossible!
Friday, July 15, 2011
FORGOTTEN BLOCKS!
Since I couldn't move forward on my "Pushin Up Spring" quilt until the backing fabric was washed, I decided to plan the layout for another applique project that I had worked on over the past winter. The pattern is called "Baltimore Bliss" and is found here.
These were hand appliqued using a wash-away stabilizer, and I recently spent some time adding a bit of machine stitched embroidery to each block. Here is the border fabric that inspired the colours in the quilt blocks.
I enjoy designing in EQ7. I imported pictures of each of the finished blocks, and then added a picture of the border, so I could see the actual border in place! Too much fun!
Since I was able to wash and dry the backing, along with the 15 yards of fabric that I recently purchase, I'll be spending the rest of the morning at the ironing board.
![]() | |||
| Block 11 |
![]() |
| Block 12 |
I enjoy designing in EQ7. I imported pictures of each of the finished blocks, and then added a picture of the border, so I could see the actual border in place! Too much fun!
Since I was able to wash and dry the backing, along with the 15 yards of fabric that I recently purchase, I'll be spending the rest of the morning at the ironing board.
Labels:
applique,
borders,
embellishment,
embroidery,
EQ7,
quilt block,
quilts
Friday, June 3, 2011
FINISHED MY MINIATURE QUILT
I just put the final stitches into the binding of "My Path", and took its official portrait.
My little quilt finished at 10 1/2 inches square. The drunkard's path segments finished at 5/8 inch. I plan to make more miniatures, using this method. I found a collection of blocks made from drunkard's path block units, so I plan to make a sampler quilt, to show off the variations.
Here is a close-up of the machine quilting......
I also completed the quilting and binding on one of the panel baby quilts for my guild's community quilts program. That makes 2 down, and 3 to go!
My little quilt finished at 10 1/2 inches square. The drunkard's path segments finished at 5/8 inch. I plan to make more miniatures, using this method. I found a collection of blocks made from drunkard's path block units, so I plan to make a sampler quilt, to show off the variations.
Here is a close-up of the machine quilting......
I also completed the quilting and binding on one of the panel baby quilts for my guild's community quilts program. That makes 2 down, and 3 to go!
Tuesday, May 31, 2011
LARGE POLKA DOTS
I've always been fascinated with Drunkard's Path blocks, and found a pattern, using polka dot fabric to make a miniature Drunkard's Path quilt! I've been hunting for 1 inch polka dots in opposite colours (eg. red with white dots and white with red dots), for a while, and when I found them, it was usually only available in one colourway. The polka dot fabric also has to have enough background around each dot to cut the blocks.
On my trip to Kitchener-Waterloo, I found the right colourways, but only in 3/4 inch dots.
So here is how I drafted a template to cut the small blocks.
I began by drawing a 3/4 inch circle. I used my perfect circle templates to do this, but chose one a bit smaller than 3/4 inch to compensate for the ink line. Then I drew a vertical line through the centre of the circle, then another at right angles to the first.
When I check the original pattern, the distance from the edge of the quarter circle was half the partial diameter. The quarter circle was 3/8 inch, so I added another 3/16 inch to the left of the circle. That made the finished block size 9/16 inch. I then add the 1/4 inch seam allowance to all four sides which made the cut size 1 1/16 inch square.
I made a second template and taped it to the corner of my small ruler, using this to help line up the corner on each polka dot. With my fabric, I found I could only cut every other row of dots.
These are the two blocks that are needed to make the quilt. I made stacks of pieces, and then made up the simple 4-patch blocks. These two blocks alternate to make the quilt top. There are 12 of one block and 13 of the other.
Here is my finished quilt top. Mine ended up at 10 1/2 inches square. I didn't have any fabric the matching shade of blue for a border, but pulled this great dotty fabric from my stash. I added tiny yellow piping , using the "Piping Hot Binding" method. It will finish with yellow binding as well.
Now I have to find other drunkard's path variations to play with more polka dots!
On my trip to Kitchener-Waterloo, I found the right colourways, but only in 3/4 inch dots.
So here is how I drafted a template to cut the small blocks.
I began by drawing a 3/4 inch circle. I used my perfect circle templates to do this, but chose one a bit smaller than 3/4 inch to compensate for the ink line. Then I drew a vertical line through the centre of the circle, then another at right angles to the first.
When I check the original pattern, the distance from the edge of the quarter circle was half the partial diameter. The quarter circle was 3/8 inch, so I added another 3/16 inch to the left of the circle. That made the finished block size 9/16 inch. I then add the 1/4 inch seam allowance to all four sides which made the cut size 1 1/16 inch square.
I made a second template and taped it to the corner of my small ruler, using this to help line up the corner on each polka dot. With my fabric, I found I could only cut every other row of dots.
These are the two blocks that are needed to make the quilt. I made stacks of pieces, and then made up the simple 4-patch blocks. These two blocks alternate to make the quilt top. There are 12 of one block and 13 of the other.
Here is my finished quilt top. Mine ended up at 10 1/2 inches square. I didn't have any fabric the matching shade of blue for a border, but pulled this great dotty fabric from my stash. I added tiny yellow piping , using the "Piping Hot Binding" method. It will finish with yellow binding as well.
Now I have to find other drunkard's path variations to play with more polka dots!
Friday, May 20, 2011
PRESIDENT'S SCHOOLHOUSE CHALLENGE
The latest tradition with the outgoing President of the Limestone Quilters' Guild is to have a quilt challenge for the final meeting of the year. This year's challenge consisted of using an 8 inch finished schoolhouse block and making a wall hanging, no larger than 20x30 inches.
Of course, I left mine until almost the last minute. I used a schoolhouse block from EQ7, and pulled some fabrics from my stash. Since I had lovely "sky" fabric, I didn't want to cut it into small pieces to finish the block, so I made a base layer of sky and grass, then I turned the seam allowances under and machine appliqued the schoolhouse to the background!
I decided to add some thread painting, so first I stitched a tree
Then I added the little flowered area......
I added some small buttons to the front of the schoolhouse, for a door knob and the heart because it mimics my guild's logo.....
I decorated the tree and the schoolhouse with tiny quilt blocks, cut from fabric bought many years ago.....
And finally the finished product!
I was amazed at how many sewing related fabrics I found in my stash! I can't wait to see what others have done. They will be on display on June 1 at our spring dinner meeting, and they hope to have them on display at the quilt show in June 2012 as well.
Of course, I left mine until almost the last minute. I used a schoolhouse block from EQ7, and pulled some fabrics from my stash. Since I had lovely "sky" fabric, I didn't want to cut it into small pieces to finish the block, so I made a base layer of sky and grass, then I turned the seam allowances under and machine appliqued the schoolhouse to the background!
I decided to add some thread painting, so first I stitched a tree
Then I added the little flowered area......
I added some small buttons to the front of the schoolhouse, for a door knob and the heart because it mimics my guild's logo.....
I decorated the tree and the schoolhouse with tiny quilt blocks, cut from fabric bought many years ago.....
And finally the finished product!
I was amazed at how many sewing related fabrics I found in my stash! I can't wait to see what others have done. They will be on display on June 1 at our spring dinner meeting, and they hope to have them on display at the quilt show in June 2012 as well.
Labels:
applique,
blocks,
embellishment,
piecing,
quilts,
thread painting
Monday, April 18, 2011
DESIGN WALL MONDAY
I finished the quilting on this Community Quilts project, and added binding. It feels great to get back to some quilting!
I saw this Bonnie Hunter block in the latest Quiltmaker magazine, so thought it might be good for using my strips in bins. It is made from 2 inch and 1 1/2 inch strips, so I've been cutting like mad to make sure I have a good variety of colours before I sew any more.
The sample is made with 2 inch strips in the inner rows and 1 1/2 inch strips in the outer rows. To make the block you make 2 like this, and 2 reversed, with the 1 1/2 inch strips as the inner rows and the 2 inch strips as the outer.
4 block segments go together to make the finished block, and the only matching is at the hourglass seams. I can't wait to get more of these sewn, but I have more quilting to do for Community Quilts, and my Pfaff has to go in for repairs this morning. I could piece on my Juki, but it doesn't have as accurate a 1/4" foot, so I mostly use it for quilting, which it does wonderfully!
Check out Judy's blog to see what everyone is working on this week.
I saw this Bonnie Hunter block in the latest Quiltmaker magazine, so thought it might be good for using my strips in bins. It is made from 2 inch and 1 1/2 inch strips, so I've been cutting like mad to make sure I have a good variety of colours before I sew any more.
The sample is made with 2 inch strips in the inner rows and 1 1/2 inch strips in the outer rows. To make the block you make 2 like this, and 2 reversed, with the 1 1/2 inch strips as the inner rows and the 2 inch strips as the outer.
4 block segments go together to make the finished block, and the only matching is at the hourglass seams. I can't wait to get more of these sewn, but I have more quilting to do for Community Quilts, and my Pfaff has to go in for repairs this morning. I could piece on my Juki, but it doesn't have as accurate a 1/4" foot, so I mostly use it for quilting, which it does wonderfully!
Check out Judy's blog to see what everyone is working on this week.
Monday, March 28, 2011
DESIGN WALL MONDAY
My wall is a little bare. I have finished the last block of the fairy tale series by Bobbysocks Quilts.
The twelve blocks will have to wait until I return to my stash for completion. I have collected lots of red with white, white with red, and red, white and black fabrics over the past few years. I save them to use with my redwork projects. I guess I'll have to figure out an interesting way to set the blocks. I try to do something different with each project.
I'm almost finished block 11 of the Baltimore Bliss quilt from Fat Cat Patterns.
I also managed to do all the "stitch-in-the-ditch" quilting on my pinwheel "Stack-n-Whack" quilt this morning (blocks shown here). I am in the process of hand stitching the binding, which will take a while as this quilt is big!
Now head over to Judy's blog to see what projects everyone has on their design wall.
The twelve blocks will have to wait until I return to my stash for completion. I have collected lots of red with white, white with red, and red, white and black fabrics over the past few years. I save them to use with my redwork projects. I guess I'll have to figure out an interesting way to set the blocks. I try to do something different with each project.
I'm almost finished block 11 of the Baltimore Bliss quilt from Fat Cat Patterns.
I also managed to do all the "stitch-in-the-ditch" quilting on my pinwheel "Stack-n-Whack" quilt this morning (blocks shown here). I am in the process of hand stitching the binding, which will take a while as this quilt is big!
Now head over to Judy's blog to see what projects everyone has on their design wall.
Labels:
applique,
binding,
design wall,
quilts,
redwork
Wednesday, March 23, 2011
ANOTHER FINISH
Raggedy & Friends is finished! Thanks Kaaren at The Painted Quilt.
I wasn't sure how to quilt it, so I used Kaaren's quilt as inspiration. I don't usually do regular feathers, but managed to stitch some in this project. I reverted to my "Hooked on Feathers" type for the border.
I stippled around the stitching in the redwork blocks with shiny white rayon thread. The stitch in the ditch was done with monofilament (invisible) thread, and the stitching in the black sashing was done with the smoke colour monofilament. The rest was stitched with a medium beige coloured thread, showing nice dimension in some of the areas, and showing up wonderfully on the darker fabrics. I stitched area by area, and was surprised how quickly I finished. I used a chalk pencil to draw in some guidelines, but just stitched freely, using my Juki set into a table and moving the quilt.
Now I'll be able to add the fabric used in this quilt to my stash report on Sunday!
I wasn't sure how to quilt it, so I used Kaaren's quilt as inspiration. I don't usually do regular feathers, but managed to stitch some in this project. I reverted to my "Hooked on Feathers" type for the border.
I stippled around the stitching in the redwork blocks with shiny white rayon thread. The stitch in the ditch was done with monofilament (invisible) thread, and the stitching in the black sashing was done with the smoke colour monofilament. The rest was stitched with a medium beige coloured thread, showing nice dimension in some of the areas, and showing up wonderfully on the darker fabrics. I stitched area by area, and was surprised how quickly I finished. I used a chalk pencil to draw in some guidelines, but just stitched freely, using my Juki set into a table and moving the quilt.
Now I'll be able to add the fabric used in this quilt to my stash report on Sunday!
Subscribe to:
Posts (Atom)