Showing posts with label paper piecing. Show all posts

Sunday, October 6, 2019

ANOTHER MISSED PROJECT!

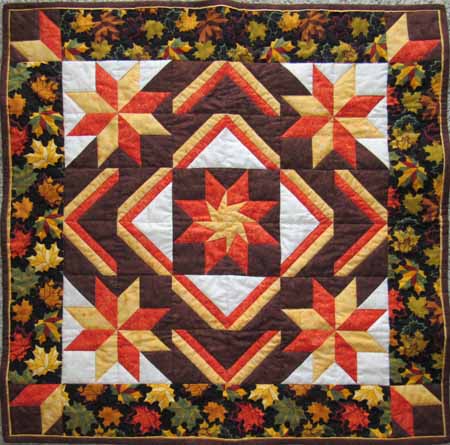
During our June meeting, our out-going guild president announced a challenge.  Those who chose to participate, pulled a box front from a large brown envelope, and had to complete a project of their choice, using all the colours on the box.

Of course, I forgot all about it until a couple of days before our meeting in September.  They only work I had done towards the project, was to pull one piece of fabric from my stash.

I spent some time planning the project using EQ8, and I even printed two parts so I could paper piece them. 

My quilt ended up being 15 1/2 inches square, and I used all of the small piece of red violet that was in my stash!  I had fun quilting the small project, and even tried the "hand quilting" stitch on my Bernina.  It looked fine, but next time I'll use a heavier weight thread in the bobbin!
There were lots of finished challenges at our September meeting, and a few more in October.

Sunday, February 3, 2019

STASH REPORT SUNDAY

Fabric used this week  4.125 yards
Fabric used year to date  4.125 yards
Fabric added this week 0 yards
Fabric added year to date  6 yards
Net used 2019  -1.875

I finished the first of two mystery quilts this past week.  It is a paper pieced wall hanging designed by Carol Doak.
I also have the top for the second mystery quilt completed, but I'm busy finishing the quilting on my sister-in-law's king size quilt.  It will be pin-basted this week, I hope. 

 I saved all the selvedge edges, and have used them to cover some clothesline, with the plan to make a basket to match the quilt.

My progress had been slowed in the past week due to cold temperatures.  ( I'm not really complaining since many parts of North America were suffering from artic temperatures!)

My sewing room is an unheated space built under the carport, and I waited for the sun to warm my room each day.  Unfortunately we had many cloudy days.......
Things are back into the normal range, so I should have some large blocks of time to work this week!
 

Thursday, January 17, 2019

STILL STITCHING

No finishes yet!  My group has been making a paper pieced wallhanging, using a pattern by Carol Doak.  I have my quilt top completed, but haven't decided on a backing fabric yet.
This is a picture of all the pieces, cut, labeled and ready to stitch.

This is my completed top.  I changed the orientation of the side-centre blocks (they were supposed to be stitched to form an X shape).  I called it my mistake,  design decision!  There are several in my group trying this pattern, and I am excited to see all the different quilts when they are completed.

We are also working on a pieced project, but I think that there are only 3 of us working on it at this time.  There are 9 fabrics used in the quilt top, and all the pieces were cut before any sewing occured.  Again, zipper bags to the rescue, as each colour had a bag, and I labelled all the parts with their designation.  It certainly made it easier to work on each step, by colour and part number!
I have the blocks completed, but they need another border around each before they go together into the quilt top. The sets of blocks form pinwheels in different directions.  As you can tell by my colour choices, my main colour is pink, in honour of my new granddaughter!  I hope this will be used in her room in the future.


Sunday, February 4, 2018

STASH REPORT SUNDAY

Fabric used this week  1.75 yards
Fabric used year to date  1.75 yards
Fabric added this week  5 yards
Fabric added year to date  33.625 yards
Net used 2018  -31.875 yards

I'm still in the red, but at least I have a finish!
I had fun with these blocks, but decided that I wanted to get back to other projects, so I stopped at 3, and made a runner.

I got back to work on one project.   I had made both the blocks and the alternate blocks but had to make the pieced setting triangles.  When I checked my instructions, I found that all the edges would be on the bias, so I used EQ8 to draw the block, then I divided it in half, and printed out templates for the unusual shapes, then I divided it into 4 pieces, so I could get templates for the corner triangles as well.  I spent yesterday piecing the side and corner triangles, then used the living-room carpet to lay the blocks out, then pick them up in rows for sewing.  This morning I managed to sew the rows in one direction, and then pin them in the opposite way, but it began raining, and since my sewing room is a sunroom under the carport, the rain hitting the aluminum roof was just too loud, so I came inside and reconciled my back accounts - a job I always put off!
I also received the final instructions for the borders for my guild's scrappy BOM quilt, so when I get the first one done, I'll begin stitching the borders (all pieced!) 
I'm linking up with quiltpaintcreate today to share my stash report.  

Sunday, January 28, 2018

QUILT FIXED, AND ANOTHER PROJECT!

I posted this picture of the centre of my version of my guild's BOM quilt project, and discovered that I had twisted two of the green blocks.

I spent some time with my seam ripper, un-stitching the two offending blocks and turned them, ready to sew.

Much better now!  I was surprised that I didn't see the problem when I was pinning the rows together.

This has been a strange winter for me, as I am the type of quilter who rarely has more than 2 projects on the go at the same time.  Saying that, I started another project this week, but should be able to complete it soon.


I had joined the "Slow and Steady Quilt Along by Paula Storm" group on facebook, and finally found/made time to try my favourite block - spinning star.  I like trying new methods, and this was made by paper piecing the block using freezer paper.  You can reuse the pattern many times, as you sew next to the folded freezer paper instead of through the paper, so when the block is complete, you have no paper to remove, only pop off the freezer paper pattern, and make another block!  Paula has a blog with the directions and even videos of each row, as well as suggested quilting ideas.  You have to join the facebook group to access them.
I made three blocks and added setting triangles to make a runner.  I'm off to look for a border fabric in my tiny southern stash, but I may just add binding.


I'm linking to Small Quilts and Doll Quilts.   We are currently in Ormand Beach Florida, waiting to spend the evening at Bonnie Hunter's lecture and trunk show!

Friday, December 19, 2014

A COUPLE OF SMALL FINISHES

I've been busy with Bonnie's mystery quilt, Grand Illusion, but I managed to get a couple of small items finished this week.

 First is a miniature quilt called Shooting Star.  It is 23 inches square, and made with some gradated fabrics leftover from a previous project.
The blocks are paper pieced from a pattern in a 20 year old magazine!
I stitched feathers in the wide border, and a feathered wreath in the cornerstones.
I also layered and quilted this cute panel that has been in my stash for quite a while.  I used yellow "gingham" flannel on the back.  The stuffed animals, letters and shapes are outlined, with a large stiple in the background.
I stitched alternating leaves in the faux pieced border
.  I'm sure it will keep a little one warm!

Monday, December 1, 2014

DESIGN WALL MONDAY

I, like so many others, am working on Grand Illusion, the mystery quilt from Bonnie Hunter at Quiltville.  So far, I've made the 280 half-square triangle units in Step 1.


They are waiting patiently for me to cut the yellow and black squares to complete the 100 broken dishes blocks.
This is my collection of pinks and aquas from my stash.  I was fortunate that Bonnie sent out the fabric requirements before we headed south, so I could "shop my stash".
I've also been working on a miniature paper pieced wall hanging.


This is the first of five spinning star blocks.  The rest are partly stitched into block 1/4's, and are waiting to be stitched into 1/2's and then the final block.

The blocks finish at 4 1/2 inches.  I found that I had to be very organized to get the right colours in the right spots.

Check out all the creativity shared at Judy's blog, Patchwork Times. 

I'm also linking to the Grand Illusion link-up here.

Monday, November 24, 2014

DESIGN WALL MONDAY

Started quilting the rubber ducky quilt, destined to be a 6 month birthday gift for our grandson, who is due late in January.

I had purchased the 2 panels and some of the border fabric last winter "just in case".
 Of course, you can't just have one project on the go.  I cut out some small dresden fan pieces, using leftover 30's fabric from one of last year's projects.  I had a vest panel that was 30's style, but didn't use the appliques that were also included.  I've been sitting turning the edges with a glue stick while I watch TV in the evenings.  I'm not sure if this will be a wall hanging or a table runner.
 I also printed out the paper piecing pattern for a small star block.  It uses gradated fabrics, and I had some of those leftover as well.  I'll be making it in shades of green and gold.  There will be 5 blocks when it is completed, so I need 5 identical units.  I made a chart for each set, so I don't mess up the colour placement.  I also measured and will pre-cut all the sections.  That certainly speeds up the work.

I am planning to join in with Bonnie Hunter's mystery quilt that begins on November 28th.  I've made one or two before, but always waited until I returned to my main stash before starting.  This time, the colours were announced early enough to pull fabric from my stash and bring it along.

Head over to Judy's blog, Patchwork Times, to see what others are creating this week.

Friday, June 13, 2014

TOP COMPLETED....

Minus the borders! 

 Now I'm looking forward to some fun machine quilting, to add a bit more definition to the flowers and leaves!

I made some changes in the colour placements as I went along.  I spent much of this morning carefully removing 4 hexagons and replacing them with slightly different colours of fabric, mostly in the "table" area, due to a lack of choice in my stash.
The pattern is found at The Inbox Jaunt.  It was challenging, but fun to make!  Thanks Lori and Peggy - your great photography and interesting interpretation are much appreciated!

Thursday, June 12, 2014

GETTING THERE.......

Good progress yesterday.  DH was out all day, so I just stitched!

When I first began this project, it just looked like blobs of colour, but now I can see the picture appearing.

Today is provincial election day in Ontario, so I hope everyone takes time to vote.  DH and I headed to the polls this morning, followed by a trip to the bank, then the grocery store, and my morning is over already!

Hopefully I'll get back to stitching this afternoon!  Thanks to Lori at The Inbox Jaunt, the link to the pattern is here.  

Tuesday, June 10, 2014

A BIT MORE PROGRESS

I'm working on the machine pieced hexagon project today.  I can't believe how long it takes.....
(pattern available here )

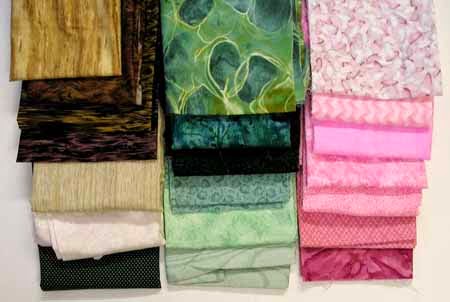
These are my fabric choices.  The dark fabric at the bottom left is actually a dark green with pin dots, used in the wall area.  The left row also has the window and window frame fabric and all the floor fabric.  The middle row has the vase fabric (bottom 3), then the leaf fabrics, and of course, the rest are for use in the hydrangea petals.
I've been removing paper as I go, and usually only work on one hexagon at a time.  I considered piecing them all, but even though the pattern is very well labelled, I didn't want to make a mistake when piecing.  After looking at the original photo, I decided to mark all the "table" pieces with the wood grain going in the same direction.  I don't know if it will make a difference in the finished quilt, but I'm enjoying the challenge.  I also decided how I want to press the seam allowances so it will lay flat when completed.  I'll probably be adding some thread painting and of course machine quilting when it is complete, so I want the surface to be as smooth as possible.

Monday, June 9, 2014

DESIGN WALL MONDAY

In mid-May, Lori Kennedy of The Inbox Jaunt, shared a paper piecing pattern.  Peggy Riemer had used one of Lori's wonderful photographs, and turned it into a paper piecing pattern to share.  The most intriguing thing, was that it was designed in hexagons!
I downloaded the pattern, and knew that I'd have to try this project right away.
I printed all the pages, cut out the hexagon units (some needed to be glued together, and pinned them on my design wall.
I am following the piecing sequence page carefully, and I decided to stitch all the hexagons together by machine.  Of course, I had to add each one as it is completed, and I've been removing the papers once each section is fully surrounded.
The biggest challenge was to choose fabrics.  I used the photo for colour cues, but since I have more "prints" than solids, hand-dyes or batiks in my stash, I'm anxious to see how it will look when it is finished.
This is a closer look at the back so far.  I realized very quickly, that I can't work on this at the end of the day - it needs lots of concentration to assure that the correct fabric is placed in each location, and to do the precision piecing required to sew the hexagons accurately by machine.  Good thing I love a challenge.   I decided that I won't share the front side until it is completed - right now it looks like coloured blotches!

Check out all the creativity shared at Judy's blog, Patchwork Times.


Monday, February 17, 2014

DESIGN WALL MONDAY

This wall hanging is about 40 inches square.  The tea pot blocks had been in my stash for a long time, but I think what stopped me from using them, was that there were only 8.  I decided to make a paper pieced block to round it out to 9, and found this one in my stash of patterns.  The original block was a mystery project from Paper Panache.  It was shared in time for Mother's Day a while back, and has a heart theme (handles, cup and tea pot lid).  There were also hearts on the pot, but I decided to make it all in print fabric instead.  I also used the same print for the binding.  Now I have to find a home for it!
Some things are difficult to photograph, and I find that embroidered blocks, especially those with lots of metallic thread are among the hardest for an amateur to do well......
All of the angel embroideries in this quilt were made with 3 shades of metallic thread, excluding their hair, skin and some small details.  The pot in the bottom right hand corner block is made of silver thread, and hardly shows at all. 

In person, this is a great quilt!  I decided to stop after the first border, but did add a narrow yellow accent strip to the edge before adding the binding.


Here's the star of the show!
 I just love the expressions on the sheep!  This is what attracted me to this project at first.


This project was designed by Natashia Curtin of Smee Designs and is found in the July 2012 edition of Australian Homespun magazine, available as an e-edition at Zinio.com


The designer's humour shows in every block.  My only complaint is that I was having such fun stitching the blocks, I was sad when I completed the last one!

Check out Judy's blog, Patchwork Times, to see all the shared creativity this week!

Monday, October 7, 2013

DESIGN WALL MONDAY


This will be my last design wall for a few weeks.  DH and I are in full "heading south mode".  

Last week, while looking for projects to take south, I found a panel with 8 teapot blocks.  I wanted to make a simple quilt with 9 blocks, so went hunting through my files and found the pattern for this great teapot and cup!  It was a mystery block pattern from Paper Panache!  The patterns are very complex, but lots of fun to try!
I used sashing strips to make the panel blocks fit the paper pieced one.  I have the outer border cut, along with the binding, and this project is packed and waiting to travel south.


Today DH made me write Christmas cards!  It has become our annual October job - we leave the cards, ready to mail, and our house-sitter puts them in the mail box December 1st!

Our next job is to wrap presents!  We have a trip planned to Niagara Falls with both sons and their wives next weekend, to help celebrate our 45th anniversary.  DH found a great package that includes falls view hotel rooms, dinner, breakfast, winery tours and vouchers to use at the casino.  We'll be delivering our gifts when we see them, and it is up to them to decide when to open them!


Check out all the creativity at Judy's blog, Patchwork Times.


Wednesday, February 13, 2013

JUST BACK FROM MY WEDNESDAY QUILT GROUP

DH came for a visit and took a group picture with all the baby quilts that will be donated to the local pregnancy care center.  My congratulations and thanks goes out to each and every one of the great group!  There was a lot of learning about making scrappy quilts, with many hands making light work!

This time of year, there is lots of finishing of projects happening, and a few new ones before we end our season.  We'll be heading home mid-April, and although the group could continue, it shrinks every week, as people prepare to head north.  The few that stay here year-round get together in small groups over the summer.

Today some of them tried their first paper piecing project.  I found a small 3 inch paper piecing pattern that we are making into name tags.  As the group has been growing, it has been more difficult for everyone to remember all the names, especially as some are regular attendees and others come from time to time.  They will be able to turn the finished project into a pin or a pendant, but then I'm sure they'll be forgotten at home!  There were 5 working on the block today, with much supervision - most had not tried paper piecing before!

This gorgeous block (its either 4 or 5 inches), was made by one of the new members to the group, but obviously not a novice quilter.  She has 3 more to go to finish her project!  We all love the colours..... Now that some of them have tried paper piecing, I'm sure they'll appreciate her skill and hard work even more! 

Thursday, October 18, 2012

LAST SEWING FOR A WHILE!

I finished the second part of my quilt guild's BOM.  I decided to make both versions, and I wanted to sew the next part before I begin serious packing for our trip south for the winter.

Here's option 1 with the square in a square border attached.  I had fun playing with some striped fabric.....

Here's option 2  with its square in the square border.  The centre block was paper pieced on this one, and the border blocks could be done that way too.  I chose the traditional method instead.


I just spent some time using EQ7 to help design the quilt for our Godson.  I am using a pattern, but instead of making 16 blocks, I'll be making 35.  My design is basic, but gives me the finished size of the quilt so I can calculate how much fabric to buy for the back, and also gives me the finished size of the two borders.  These will be pieced on the quilt, using leftovers from the blocks, but I know what size they have to be, so I don't make pieces that are too short or two long.

I've been looking over my list of projects that I hope to finish this winter, and it is much longer than I thought.  I keep a notebook with lists of projects that remain in our winter home, as well as batting, partial bolts of fabric, and rulers etc.  That way I don't have to transport my entire sewing room, although DH accuses me of that, every year as he packs the van!

DH and I are off to Kitchener tomorrow, to have a visit with DS2 and DDIL2.  We'll be delivering their Christmas gifts, and getting some extra hugs to last the winter.  On the way home, we'll stop in Toronto to do the same with DS1 and DDIL1.  Then three days of serious packing, laundry, cleaning, and checking our lists at least 3 or 4 times.  DH gets pretty fanatic about his lists, but when we are packing for the winter, they sure come in handy!

Tuesday, September 25, 2012

SECOND MEDALLION BLOCK COMPLETE

I mentioned the two options for my guild's BOM program here.
I posted the finished block for Option 1 on Monday.

Yesterday I finished the centre medallion block for Option 2.  It was paper pieced, and I'm pleased with the results.
 Once again, my palette was limited by my stash!  All these batiks came from my collection.  I'm hoping I have enough yardage of each, but if not, I'll have to go shopping!

Sunday, September 9, 2012

STASH REPORT SUNDAY

Used this week  17.5 yards
Used year to date  177.625 yards
Added this week  0 yards
Added year to date  121.875 yards
 Net used 2012  55.75 yards

Finishing my triangle twist quilt this week really helped with the numbers.  Paper piecing can be wasteful, but oh so accurate!  According to EQ7, and adding the backing and binding fabric, the quilt took 15 yards!

I also remembered to make the challenge blocks for my quilt guild this week (at the last minute!).  The blocks are donated to our community quilts program and used to make quilts to be donated to all sorts of worthy causes. The deadline for the blocks in the October meeting, and they are trying to collect 1000 blocks - there were just over 600 turned in last Wednesday! (I made 17)

Last week, when my DH insisted I visit the local quilt shop, I picked up a panel for a Hallowe'en wall hanging for DDIL2.  I managed to get the quilting done, using a bit of gold and irridescent mylar thread to add a bit of sparkle, and then get the border sewn on as well.  Just in time - DS1, DS2 and DDIL2 will be visiting later this month!


Check out everyone's progress this week at Judy's blog!

Wednesday, August 29, 2012

TRIANGLE TWIST TOP COMPLETE


I decided to add a border to the top and bottom to turn the rectangle into a square.  I like having some quilting space around the stars.  

After playing with many different options, using Electric Quilt, I finally decided on this border.....

 It has lots of curved seams, but forms a zig-zag design around the stars, and uses the gradated fabrics again.
Now I have to decide how I want to quilt this!  No matter how I pressed the seam allowances, the centres of the stars are very bulky.  There are 6 points meeting there, and multiple layers of fabric in the seams!

Now I have to think of which project on a long list will move to the top!

Friday, August 24, 2012

TRIANGLE TWIST CENTRE COMPLETE

 With lots of careful pinning, I managed to get the centre stitched together.  Next step is removing the paper!
(I removed the paper from the seams that would be folded under so it wouldn't be permanently trapped.)
This is the result of 2 evenings of movie watching and paper removal!  I took my time, and was careful so that none of the stitches pulled out.  It was tedious getting all the tiny bits of paper at places where seams crossed over, but so worth it!