While browsing through some old craft magazines, I found a pattern for a beaded talisman necklace.
The beads are woven together in groups of three, then joined into a circle. Then the next row is stitched to the first. The flap continued on after the first 8 rows were complete, and has an opening for the loop, which is stitched to the front.
I needed a large bead or stone to use as a closure, but after checking through my "stuff" and even looking in a shop, I decided to play with some polymer clay to make the shape I wanted. I attached the stone to the top of the pouch with a beaded string.
The clay that I used was a light blue and a white pearl colour.
I needed to make a string of beads so that the talisman pouch becomes wearable. I made some flat beads with leftover polymer clay, and I found some silver bugle beads to help lengthen the strand. As you can see, I still have some more beading to complete before attaching the strand to the other side of the pouch.
I'm still a real novice at both beading and polymer clay, but the process is fun, and time consuming, which makes it appealing to me. I'm not a fan of "quick and easy" projects.
Every once in a while, I want to do something other than quilt! (I know, this sounds insane, as I love quilting!) I was looking for some hand work to do while keeping DH company in the evenings, and I thought about the small stash of seed beads that I had collected in the early 70's!
 I found a pattern for a beaded pen in a magazine, and decided that I could try to decorate some wooden needle cases that I had in a drawer.
The first one was done with a bag of assorted colour seed beads. I only had one type of beading thread, and it was almost impossible to thread through the eye of the beading needle, but I persevered. When I had it finished, I painted it with clear nail polish to give it shine and glue it to the wood. I decided to leave the top plain for better gripping when removing.
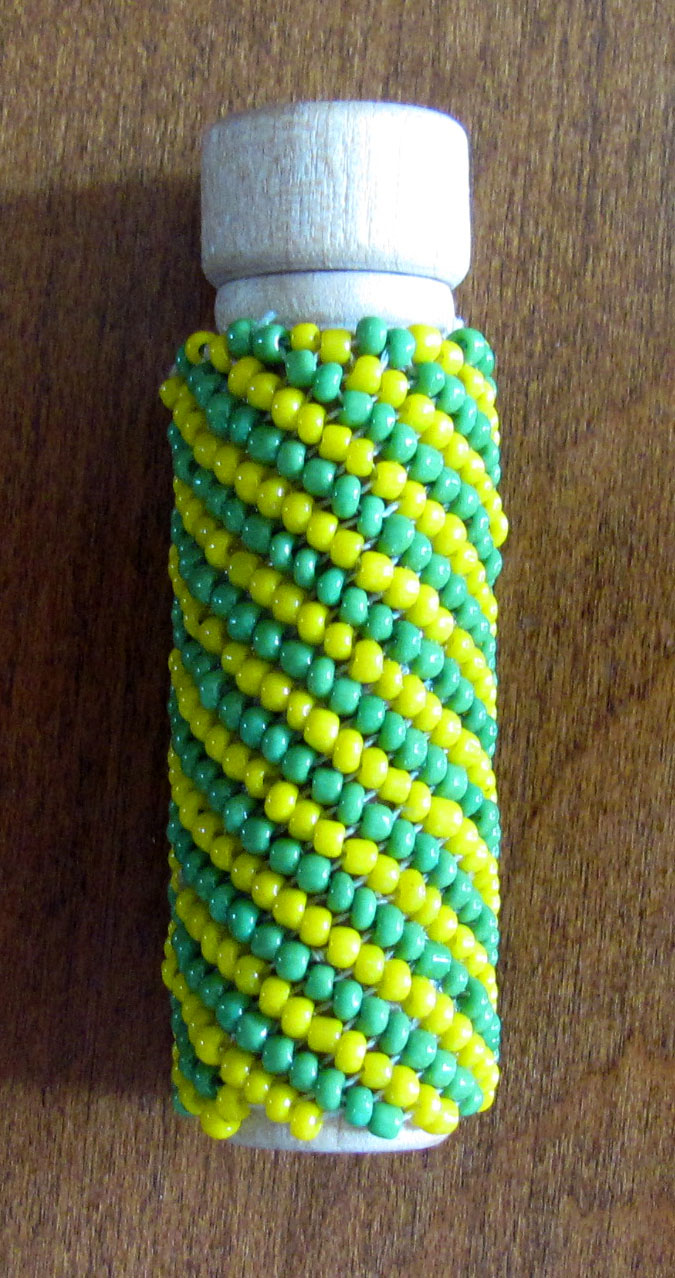
The second attempt used two colours of beads, and my stitching became more regular. I decided not to bead the bottom, in case I wanted the needle case to stand on its end.
My final attempt used a variety of beads, but now that I understood how the beading lined up, I was able to form a design of sorts. I decided to make a base for this one too, but I think I should have used matching beads!
The beads were stitched using a Peyote stitch - I think!
I found a pattern for a beaded pen in a magazine, and decided that I could try to decorate some wooden needle cases that I had in a drawer.
The first one was done with a bag of assorted colour seed beads. I only had one type of beading thread, and it was almost impossible to thread through the eye of the beading needle, but I persevered. When I had it finished, I painted it with clear nail polish to give it shine and glue it to the wood. I decided to leave the top plain for better gripping when removing.
The second attempt used two colours of beads, and my stitching became more regular. I decided not to bead the bottom, in case I wanted the needle case to stand on its end.
My final attempt used a variety of beads, but now that I understood how the beading lined up, I was able to form a design of sorts. I decided to make a base for this one too, but I think I should have used matching beads!
The beads were stitched using a Peyote stitch - I think!